Sunday, 9 February 2014

Teapot garden art


Teapot and glass beads as water drop

WONDERFUL


Muffin Tin Planters

As spring gets underway, live plants abound both indoors and out. A neat way to plant some green in the kitchen is with a baking tool: a muffin tin!The wells in a muffin tin are the perfect size for holding small live plants directly from the nursery flat. Choose a moss as shown or even plant herbs in an old tin and keep it in your kitchen. Water the plants by misting. If you're using a muffin tin long-term for small plants, repurpose and old tin and consider punching holes in the bottom of each well.


EASY small green house

This is portable green house and is great to start small seeds or small vegetables (such as herbs)
Fast to make and super economic

YOU WILL NEED

1. Plastic can or barrel (white is best
2. Transparent or semi transparent plastic sheet
3. 4 screws with nuts
4. 4 little pieces of plywood about an inch by and inch
5. bike inner tube or an old hose
6. duck tape

Jugsaw
Drill


Thanks gardening world for the photos

Getting clean water

In a life and death situation this would be great to know and I know I would have cloth so lets hope I could find containers lol

Take a piece of fabric and place one end in the dirty water and the other in another container and yes you will get clean water


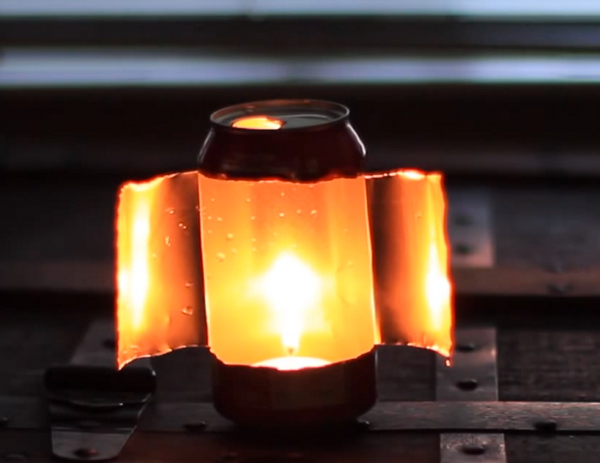
Candle Light When Camping

I love this idea when camping or when you need more light in a black out

Take a soda can , cut it open in the front and place your tealight candle inside.
You get a stronger light and breeze is not a hassle


Small space washing machines

This is such a great way to hide a washing machine in your kitchen and why was it nit around when I lived in a small apartment


Saturday, 8 February 2014

Circular needle storage

Can’t get any easier than this, the 15-minute circular needle holder.


Stuff you need
Cotton spools, wooden would look better
Approx 1 1/2 – 2 yards fishing wire
Permanent markers (I used a silver paint pen and a sharpie)
Scraps of yarn or fabric
Glue (hot glue gun was weapon of choice for me)
Note on the spools – mine have 1/4″ hole which fits up to a US size 10 needle. This was adequate for me, but if you require ones for larger sizes you can drill or use a needle file to enlarge the opening, or look for a larger diameter spool.
What to do with it
First, label all your spools with the appropriate needle size. For my end spools I wound a piece of scrap yarn around the spool and secured it with a dot of glue. A piece of fabric cut to size would also look nice. You could obviously embellish these however you like. I went with simplicity (also known as “easy”). Next cut a length of wire about 1 1/2 – 2 yards long, I just kinda eyeballed it. Thread wire though first spool and hold in half so both lengths of wire are equal. Following the diagram below, weave the wire in and out of each spool.

Then, once the last spool is wired on, twist the remaining two wire lengths around each other and fold into a hook shape. Trim ends and load up with all those unruly needles.


FANTASTIC

Thanks to pieknits for the tutorial and photos