Tuesday, 31 December 2013

Slow Cooker Apple Butter

Yummmmmmmmmmmmmmm and soooo easy

YOU WILL NEED

1. 1 dozen apples
2. 1/2 cup of water
3. 1/4 cup brown sugar (pack firmly)
4. 1/2 teaspoon all spice
5. 1 teaspoon cinnamon


Using an apple corer, remove the core from the apples. Then peel skins off and cut into cubes. Toss the apple cubes in the brown sugar, all spice, and cinnamon.Then pour into the crock pot and add water. Set crock pot on the low setting and leave it for several hours or overnight.
I prepared my batch before bed one night, and it was ready in the morning and the house smelled amazing!
If the mixture is not thick cook for another couple of hour, it may take up to 16 hours of cooking all up. 
If you want it less sweet use less sugar

Blend any lumps then enjoy 

Easy Gorgeous and makes the best gift.
I love mine on ice cream lol and it will last up to SIX WEEKS  in the fridge AND you can preserve it .

The Quiet Achiever

Friday, 27 December 2013

Lemon Bomb Toilet Cleaner

 Easy, good for the plant and it works
Thanks to Camp Wonder for the instructions and photos


 YOU WILL NEED 

For a lemony clean add a 5 to 6 drops of Lemon   I get mine from Big Tree Supplies in Brisbane http://www.bigtreesupplies.com.au/ Love their quality and price

1 Cup Vinegar and 1 Cup Baking Soda...

I would suggest you combine the ingredients in the following order :)


First of all, choose a large jug , pan or bowl because once you combine all the ingredients the mad, mad fun begins!  Add the Lemon EO and the white vinegar first, then dump in the baking soda and watch the magic!  Actually, you might want to grab it and run because it grows rather quickly!  There was maybe 2 seconds between photos, and look how it grew!  


Apologizing in advance!  Somehow it doesn't seem right to post a photo of a toilet bowl :-/

But you've got to see this!  Once you drop the contents into the bowl it fills up with this thick, glorious, lemony, foamy cleaning genius that works amazingly well!  I let the magic sit for awhile...then flush it down and clean the pipes too!
SIMPLE ingredients!  
Good for you, the planet AND your plumbing!  I use this basic recipe for unclogging my kitchen sink so consider it a bonus to that sparkling commode, the plumbing gets a good cleanse too!


The Quiet Achiever

Tuesday, 24 December 2013

SHAKE IT UP salt and pepper Lids

Want to know what to do with those salt and pepper shakers you see in op shops all across the country
How about this, AND ITS EASY TO MAKE

YOU WILL NEED
1.salt and pepper lids  (Op shops or our nan's lol)

2.dowel (any hardware store and cheap as chips)

3.E6000  Glue

4. A picture of something  cool to wrap around the dowel ( I prefer fabric lol)

5.Diamante chain, (most craft stores or ebay)


 1.Get your salt and pepper lids and find the dowel that fits snugly inside, then cut your dowel to the desired length

2.Wrap your dowel in what ever  cool picture you have or in my case I prefer fabric lol

3.Glue the ends of the dowel then place the salt and pepper lids one on each end and let dry, this wont take long as the E6000 is a very good quality glue.

4. Glue the diamante chain into place and of course it is up to you where you want to put it.

5. Using a thin wire which can be poked through the salt or pepper holes make a ring to hold the chain.
6.  Add your chain

 HINT 

 6.  To protect the stones from coming loose and to stop the diamante chain from discolouring I either spray with glue or paint with clear nail polish as this will protect it for years.

The finished pendant is by Kathy Thompson,

Love your  up-cycling  Kathy


The Quiet Achiever

Monday, 16 December 2013

DIY BACON SALT


  • 6 slices of bacon
  • 1/2 cup coarse sea salt
  • 3/4 teaspoon ground peppercorns
Preheat an oven to 350 degrees. Lay your bacon out in single strips over a cookie rack and put that in a baking tray. Bake for 20-25 minutes until the bacon is crisp and starting to blacken(It should look overcooked rather than how you’d normally eat bacon).
Once the bacon has cooled, use a paper towel to press out any excess oil. Transfer the bacon to a food processor and process until there are only small chunks and a paste begins to form. Add in the sea salt and ground pepper(note: whole peppercorns will not break up in the food processor) and continue to process until the salt breaks up into smaller pieces and mixes with the bacon. Transfer to an airtight jar and keep in the refrigerator when not using.

HONEY COW


http://www.instructables.com/id/Make-your-own-Honey-Cow-Top-Bar-Bee-Hive/


Beekeeping is an ancient DIY art, performed by amateurs and makers for centuries. Anyone can produce natural honey at home. People keep bees in many different kinds of hives, but we will focus on a cheap and simple design, called the Honey Cow.

The Honey Cow is designed to mimic nature as much as possible. Unlike commercial hives, it does not have frames, foundation or excluders. Instead, it just has top bars, allowing the bees to do what they would in a fallen log: build beautiful, natural combs. Because it is less intrusive to the bees, it's easier to make and manage, which makes it a perfect beginners backyard hive.

Once you have a hive, you will want to gather a few extra bits of equipment, like a veil, a smoker, and a bee feeder. With your equipment at hand, you can explore ways to get your bees, from capturing a swarm to buying a package or nucleus from a fellow beekeeper. After your bees have had a full summer to build up honey, you can start reaping the rewards of tending bees: wonderful, home-grown honey.

I encourage everyone interested in beekeeping to join a local bee club. These clubs are filled with wonderful people who love to help get beginners started. Don't be discouraged if folks in your bee club don't have the same type of hive as you. There are as many ways to keep bees as there are beekeepers.

MATERIALS:
55 gallon plastic barrel, preferably food grade (makes two hives)
22 feet of 1”x2” nominal lumber
46 feet of 1½”x1” lumber
2 X 8 foot of 2”x4” nominal lumber
A 3 feet by 4 feet piece of tin
20 - 1½” wood screws
10 - 2” wood screws
8 - ½ “ screws
Bungee Cord or tie wire
45 feet thin moulding OR natural fiber string and beeswax

TOOLS
circular or jig saw
drill
tin snips
tape measure and marker

The Quiet Achiever

Dirt-free Potatoes – and That’s No Hay


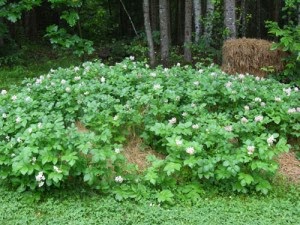
You’ll need about 1/2 a bale of hay to make the base of an approx. 4′x6′ bed. Take a flake (those are the square chunks that make up a bale) from the bale and gently pull it apart. Lay these down to form the base.
*Note: If you’re growing hay potatoes for the first time and are putting your hay down on grass, it’s best to use the whole bale for the base that first year, so buy 2 bales. It will kill the grass without tilling and you won’t have the bother of weeds.

Because the spacing isn’t very important in a hay potato bed, you can easily fit 50lbs of seed in a 4′x6′ bed. We remove any sprouts and plant them whole since the potato plants will need all the energy and nutrients they can get.


Lay the seed potatoes in their bed and top each one with a generous handful of organic potato fertilizer.


Cover the seed potatoes with the remainder of the hay. You want them to be fully covered so the potatoes aren’t exposed to any sunlight. Let Mother Nature take over from here unless it’s terribly dry, then a good dousing of water from the rain barrels once a week can help things along.


Watch them grow and blossom! About 2 weeks after the blossoms have gone by, start checking for potatoes by gently pulling back a bit of hay from around each plant. Remember to wear gloves since the seed potatoes will still be there and can be squishy! If you can stand to wait, just check their progress until they grow to the size of a golf ball before harvesting.


Start looking for recipes – you have beautiful, clean, organic potatoes to eat and enjoy!


The Quiet Achiever

Recycled Shirt Aprons

Inexpensive gifts , How about this. SHIRT APRON

Easy to make and so clever simply remove the sleeves and back' (cut them off or unpick them) sew up seams and add ties.

 what a winning recycling idea and of course the collar just slides over your head. I expect to see some of these at next years craft shows

The Quiet Achiever

Sunday, 15 December 2013

Basket and Budget Gardens

Holiday hobbies for kids
Fairy gardens are inexpensive to make and allow the whole family to be creative on a budget. Watch the idea flow and remember to line the basket with your recycled plastic bag before putting the dirt in Share photos of your fairy gardens

Baskets are in every op shop you visit and of course your local tip, I especially like using the stacking vegetable. Herb gardens are so great and look fantastic but honestly for a great effect use ground cover plants, they look good all year, and will brighten up your home and yard

 Outdoor tables can be a bit bland so how about screwing a jar lid to the underneath of the table after you have put a big hole in the lid and when every you want to quickly brighten up the table , just fill your jar with water and add flowers

There are lots of silly shoes at op shops and by removing the upper cover you find a great space to plant a garden and how effective will this look at your front door or on your table

The Quiet Achiever

Saturday, 14 December 2013

Shutter Coat Rack

This is such a great recycling idea and so easy to do AND looks amazing

You will need

an old shutter

hooks for the Shutter


 Measure the length of the shutter and mark where the hooks will go making them the same distance apart

Screw the hooks into the shutter


I like the idea of hanging the shutter like a picture so a couple of small hooks in the back of the shutter and some picture wire means I could hang this myself just like a picture between two nails on the wall or two hooks. looks good and is easy to to do


Thanks to Charlottes Cottage for the photos

The Quiet Achiever
Thursday, 12 December 2013

Recycled pet bed


 What you need:

Tools:
  • Scissors
  • Thread and some yarn
  • Thick sewnig needle
  • Meter
  • Pins (optional chalk and ruler)
Supplies/Ingredients:
  • Used hoodie
  • Acrylic blanket or pieces of cloth
  • Cushion filling or a pillow(45cmx45cm)
  • A flap ( for closing the sleeves)

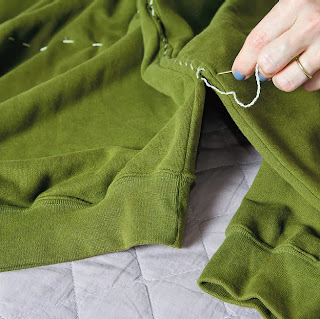
Turn your sweatshirt inside out. Gather the edges of the collar and sew them with a thread or use a sewing machine if you want it faster. Leave a small piece open.


Mark a straight line from one armpit to the other. If you prefer, use a ruler and chalk to mark on the fabric. Sew, joining the front and back of the grid, following the path. Remove the pins.


Put the sleeves along the body of the sweatshirt and pin to the sides (as shown on the picture). Leave the cuffs without sewing them.


 Insert acrylic blanket, foam or even chopped leftover fabrics through the cuffs to form the edges of the bed.


Fill the belly of the top with cushion stuffing or a pillow.


Join the cuffs sewing them together, you can also use the sewing machine if you like.


Take one piece of other fabric and put it around the cuffs so that it would cover the sewed part. Sew it with a regular stitch and turn it inwards.


cover sleeve join if you like

Thanks to Handimania for her instructions and photos

The Quiet Achiever

Edging with Bottles

Many of us know a drunk (lol ) I jest, but yes we do generally know where we can lay our hands on empty bottles.

The trick to using bottles as edging is to make sure that you fill them with sand or dirt before burying them in the ground as this generally stops the bottles from breaking as the botttom is the thickest and strongest part of the bottle.

The quiet Achiever

Wednesday, 11 December 2013

Drying herbs

 Once again recycling comes to the forefront when we want to dry herbs

How about this wonderful idea of using old picture frames with fly screen mesh and cheap chains from the hardware store or string if you prefer.Drys herbs naturally and looks very creative.


The Quiet Achiever

Reuse dollar store laundry baskets


These baskets are pretty close to useless when it comes to laundry, however turn them upside down and place them over plants you want protected from wild life or sun then this is the easiest and cheapest way there is and of course you are recycling lol

The Quiet Achiever

Colour your Fans

WHAT A BREEZE 

We started with this cheap fan


Dissemble… and remember how it goes back together 


cover the holes where the motor is 
then spay (with a can of spray paint) the whole fan and of course wait for it to dry then re-assemble it.
Check this out
Ta Daaaaaa


I bet you are kicking yourself that you didn't think of this yourself, I know I did lol. 

Thanks to the Star family for the tips, hints and photos


The Quiet Achiever